 Models continued...
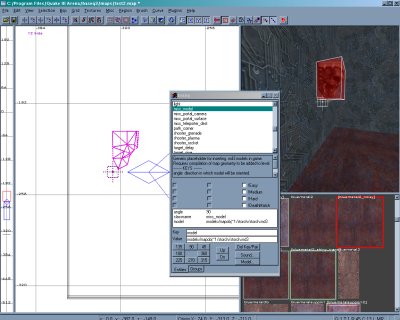
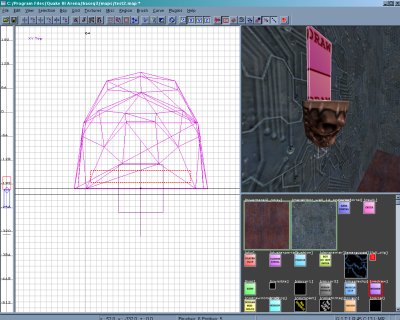
Now hit the 'n' key to bring up the entity menu unless it's allready
up. You can rotate the model by using the directional keys at the
bottom of the menu. The keys have degree values in a circle such
as 180, 90, 360, ect. Hit the keys until the model is lined up the way
you want. Then nestle the model up against the wall making sure
it doesn't overlap with the wall brush. Now deselect by hitting the
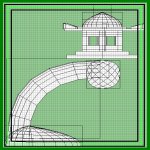
esc key. Now we're going to put a thin brush on top of the skull like
the picture below. The brush should be close to the wall but leave
at least one unit between the wall and new brush.
Models continued...
Now hit the 'n' key to bring up the entity menu unless it's allready
up. You can rotate the model by using the directional keys at the
bottom of the menu. The keys have degree values in a circle such
as 180, 90, 360, ect. Hit the keys until the model is lined up the way
you want. Then nestle the model up against the wall making sure
it doesn't overlap with the wall brush. Now deselect by hitting the
esc key. Now we're going to put a thin brush on top of the skull like
the picture below. The brush should be close to the wall but leave
at least one unit between the wall and new brush.
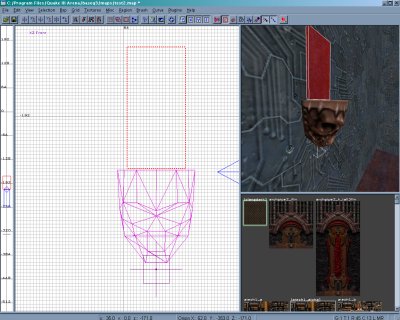 Now go ahead and with the brush still selected go to textures and load common.
Now select the nodraw texture and deselect the brush. You should see a lovely
pink color to the brush with nodraw written on it. Now use the shift+ctrl+mouse1
to just select the front of the new brush. Go up to textures in the menu and load
up sfx. You'll see a variety of fire shaders available. Select one that has the white
rectangle around it so that you know it's not just a basic image. You should see
the fire texture on the face of the new brush but it's too large for the brush.
Now go ahead and with the brush still selected go to textures and load common.
Now select the nodraw texture and deselect the brush. You should see a lovely
pink color to the brush with nodraw written on it. Now use the shift+ctrl+mouse1
to just select the front of the new brush. Go up to textures in the menu and load
up sfx. You'll see a variety of fire shaders available. Select one that has the white
rectangle around it so that you know it's not just a basic image. You should see
the fire texture on the face of the new brush but it's too large for the brush.
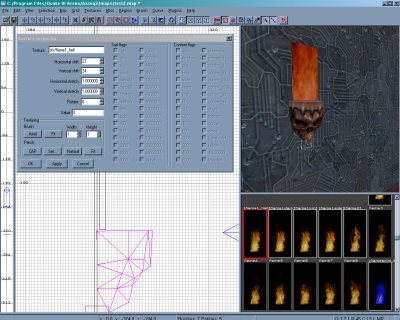 Now hit 's' to bring up the surface inspector. This menu allows you to edit
a texture on the surface of any brush. Horizontal/Vertical stretch on the
menu will allow you to reduce or enlarge the texture to fit on the brush.
The rotate option will spin the texture in the same fashion. You can also
use alt+mouse1 to move the texture directly on the 3D window.
Now hit 's' to bring up the surface inspector. This menu allows you to edit
a texture on the surface of any brush. Horizontal/Vertical stretch on the
menu will allow you to reduce or enlarge the texture to fit on the brush.
The rotate option will spin the texture in the same fashion. You can also
use alt+mouse1 to move the texture directly on the 3D window.
 Let's see how that baby looks.