 Light entities and placement
Now that you've eliminated the sky shader on the ceiling there
is no longer a light source to illuminate the room. You now have
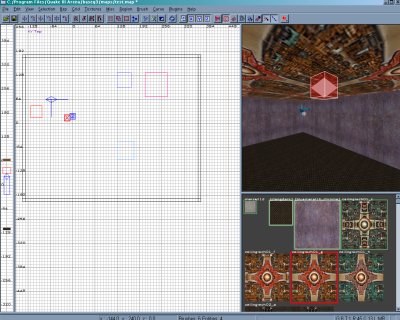
to use a light entity to let the sunshine in. Bring up the entity menu
by right clicking the center of your map in the wireframe veiw
and select light. A pop-up window will show up with a light value
usually with a default of 300. This is the amount of luminosity the
light will generate in the room. Go ahead and change the value
to 500 to really crank out the light and place the light at one end
of the room near the ceiling . Then hit the esc key to deselect the
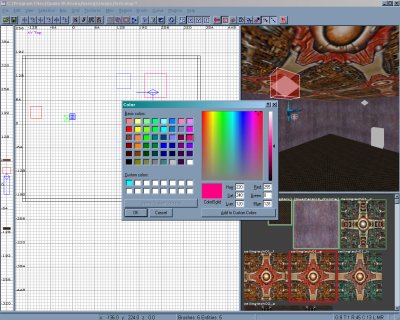
light. Now repeat the process but before deselecting the light,
hit 'k' to bring up a color menu. This is how you change the color
of the light to add that psychedelic touch to your room. Once
the color choice has been made move the light to the other side
of the room and then use esc to deselect. Let there be light.
Light entities and placement
Now that you've eliminated the sky shader on the ceiling there
is no longer a light source to illuminate the room. You now have
to use a light entity to let the sunshine in. Bring up the entity menu
by right clicking the center of your map in the wireframe veiw
and select light. A pop-up window will show up with a light value
usually with a default of 300. This is the amount of luminosity the
light will generate in the room. Go ahead and change the value
to 500 to really crank out the light and place the light at one end
of the room near the ceiling . Then hit the esc key to deselect the
light. Now repeat the process but before deselecting the light,
hit 'k' to bring up a color menu. This is how you change the color
of the light to add that psychedelic touch to your room. Once
the color choice has been made move the light to the other side
of the room and then use esc to deselect. Let there be light.
 Select the light again by using shift+mouse1 in the 3D window and then hit
the 'n' key to bring up the entity menu. You'll see that the light is highlighted
and two fields at the bottom called key and value. If you select light in the
menu above the key input the type of key and it's numerical value will be
displayed. If the light in your room is too bright, you can change the value
to increase or decrease the amount of light the entity produces.
Select the light again by using shift+mouse1 in the 3D window and then hit
the 'n' key to bring up the entity menu. You'll see that the light is highlighted
and two fields at the bottom called key and value. If you select light in the
menu above the key input the type of key and it's numerical value will be
displayed. If the light in your room is too bright, you can change the value
to increase or decrease the amount of light the entity produces.
 Now let's see how it looks. Compile the map again using the bsp option
in the menu and choose bsp_fullvis. Remember to save the new changes
to the map before you compile. Launch Q3 and give it a whirl!
Now let's see how it looks. Compile the map again using the bsp option
in the menu and choose bsp_fullvis. Remember to save the new changes
to the map before you compile. Launch Q3 and give it a whirl!